So you have a box of old letters in your attic that you don’t want to toss, but don’t quite know what do with? Well, while you’re deciding what do to with them, go ahead and get them out of that old shoe box and into an acid-free environment! Here is a step-by-step process of how I did exactly that with my grandparents’ love letters to each other during World War II. (Read more about the history of these letters here) Consider this my gift to you because, hey, now you don’t have to do the research yourself. 🙂
Step One: Create a System
Create a system that makes sense to you so you don’t lose track of what you’re doing. I live a busy life in Los Angeles, but the letters are at my parents’ house in Michigan. This meant that I could only work on this process in one week chunks that spread over the course of three years, so I had to be able to easily pick up where I left off. Here’s the strategy I set forth for myself:
1) Order letters chronologically by postmark.
2) Scan each letter and assign a filename that links it back to the physical letter.
3) Carefully place unfolded letter in an acid free folder with its envelope.
4) Place in file box.
Step Two: Get Supplies
After doing some research, I ultimately decided to order supplies from Hollinger Metal Edge, touted as “The Quality Leader in Archival Products since 1945” (which also happens to be the year WWII ended).
Here’s my shopping list (Full disclosure: these supplies are not inexpensive):

1) Standard Size Document Storage Cases
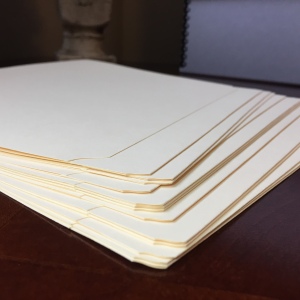
2) Reinforced Tab File Folders – 1″ full tab

3) 2 Mil Archival Polyester Envelopes in three difference sizes.
Step Three: Scan
Scan each letter and assign a filename that links it back to the physical letter. I assigned each letter a number, identified it by its date, and numbered each page. For example, the file name for the first letter is 1-Sept23-1942-1.png. In the end, the filenames looked like this:

Now, here’s the question that I should have researched more thoroughly before I scanned 80% of my letters… “What file type should I use?” Great question. I scanned mine as .png files which turns out to be less than ideal. Here are some helpful tips I received from The Genealogy Center (@genealogycenter on Instagram):
Get a good scan of all artifacts, high quality scans, 300-600 dpi/ppi. Scan as color, even black and white images/photos/documents. Save as TIFFS. Once they have been saved as digital objects, get them out of the light, into a dry place.
Looks like I have some re-scanning to do…
Step Four: Separate

On the left-side, you can see a stain from the newspaper clipping.
If you’ve ever done scrap-booking, you know by now that not all paper is acid-free. It is very important to separate your letters in such a way that they do not come into contact with surfaces that will cause them to discolor and deteriorate. Enclosed in some of the letters Howie received from his mother were newspaper clippings of soldiers who died in action (weird choice, but whatever). After 75 years of being stored together, the acid from the newspaper left brown spots on the letters.
Rather than re-write what someone else has so beautifully spelled out, I direct you to this article for more info about why this happens: https://www.framedestination.com/blog/resources/acid-arts-natural-enemy.

I used a polyester envelope to protect this postcard.
Are you back? Ok, let’s continue. This is where the file folders and polyester envelopes come in. I chose to separate each letter into its own file folder along with the envelope it was mailed in. If there were photographs or newspaper clippings, or any other enclosures, I slid them into a clear polyester envelope to protect it and to prevent it from coming into contact with the letter.
Now, something about my case: at some point in the late 40’s, my grandmother taped each envelope into a (acid-filled) scrap book. This was helpful in that they were already very organized, but dreadful in that many of the envelopes have significant discoloration and the tape she used is impossible to get off easily. Quite honestly, I gave up. There must be a way and when I figure it out, I will write another post about it. For now, I carefully removed the envelopes (tape and all) from the scrap book, placed it in the file folder (with the glued side of the envelope AWAY from the letter), and will very soon order sheets of acid free paper to insert into each folder between the envelop and the letter.
Step Five: File
As you scan each letter and put it in a file folder, simply slide that folder right on into the storage case! I purchased three of the standard size document storage cases (in light grey if you’re curious – very pleasing to the eye), which turned out to be not nearly enough space for the number of letters I have. Each box holds somewhere between 80 to 90 letters depending on how many pages each letter is. In hindsight, I would have purchased the oversized cases. You just need to make sure that your letters are stored upright, so if the box isn’t completely full at the end of the day, consider also purchasing a Document Support Spacer to take up that extra space. As you fill each box, label it with what’s inside. Since my letters are sorted first by sender and then are in chronological order, I used the date of the first and last letters in each box as well as the name of the person who wrote them.

On the top of each folder, I wrote the name of the digital file, the date of the letter, and the date of the postmark on the envelope, in that order.
Step Six: Store
Once all the hard work is completed and your boxes are labeled, find a cool, dark, dry place to store your new treasure boxes. It’s best to keep them off the ground. You never know when your parent’s pipes will freeze and the washing machine will overflow and flood the basement floor… not that I’m speaking from experience… except that I am. Just keep them off the floor.
Additional Resources:
Library of Congress: www.loc.gov/preservation/family
National Archives: www.archives.gov/preservation/family-archives
Smithsonian Institute: http://siarchives.si.edu/services/preservation
Questions, comments, or stories from your own experience? Please share below!